
In this guide
You have a character illustration. You want it to run, jump, and land—and still be usable against your game's background.
In AnimGen, the workflow is to start with a PNG that has real transparency, generate the motion in Transparent animation mode, select the useful frames, and export an alpha-enabled format. The motion preview and the final transparent asset are two different stages.
Watch our run-and-jump demo on YouTube. The launch video shows the workflow with a cyan character; this guide explains the decisions behind it, including how to give a jump pose more screen time without slowing the whole run.
Start with a usable transparent image
The character's head, hands, and feet should fit comfortably inside the image. Leave space above the head for the jump and around the limbs for the run. A tightly cropped character gives the animation less room to move.
If the character already fills most of the image, you do not need to add padding in a separate image editor. After uploading, enable Expand canvas before generating. You can add room around the image directly in AnimGen, without editing, saving, and uploading a new source file.
Start with the 80% Subject size preset. If you need more room, try 67% or 50%: a smaller percentage leaves more space around the source. Use the nine-position grid to adjust placement and leave more room in the direction of the jump. Transparent animation mode keeps the added area transparent, and the original upload is not overwritten.
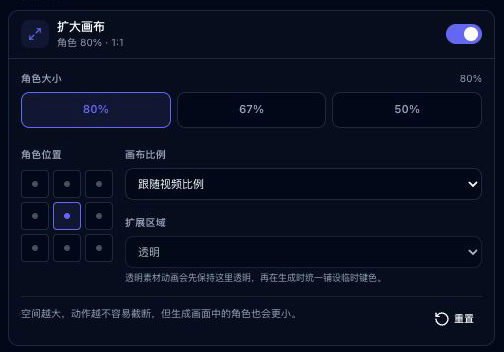
Find Expand canvas below the first-frame image in the left-hand Create panel. This local-demo screenshot uses the Chinese interface: enable the top switch, choose the subject size, then use the nine-position grid to adjust placement.
More padding also makes the character smaller in the generated frame, so use the amount your motion needs. This feature does not reconstruct hands or feet already cropped from the original; still check the generated motion for clipping. See the Expand canvas guide for the controls.
For side-by-side preset and placement comparisons, see using Expand Canvas for runs, jumps, and attacks, with the blue homepage character's actual motion sample.
For following along, use your own isolated character or our public transparent runner PNG. This is a practice asset from our examples library, rather than a promise that your generation will reproduce the launch video.
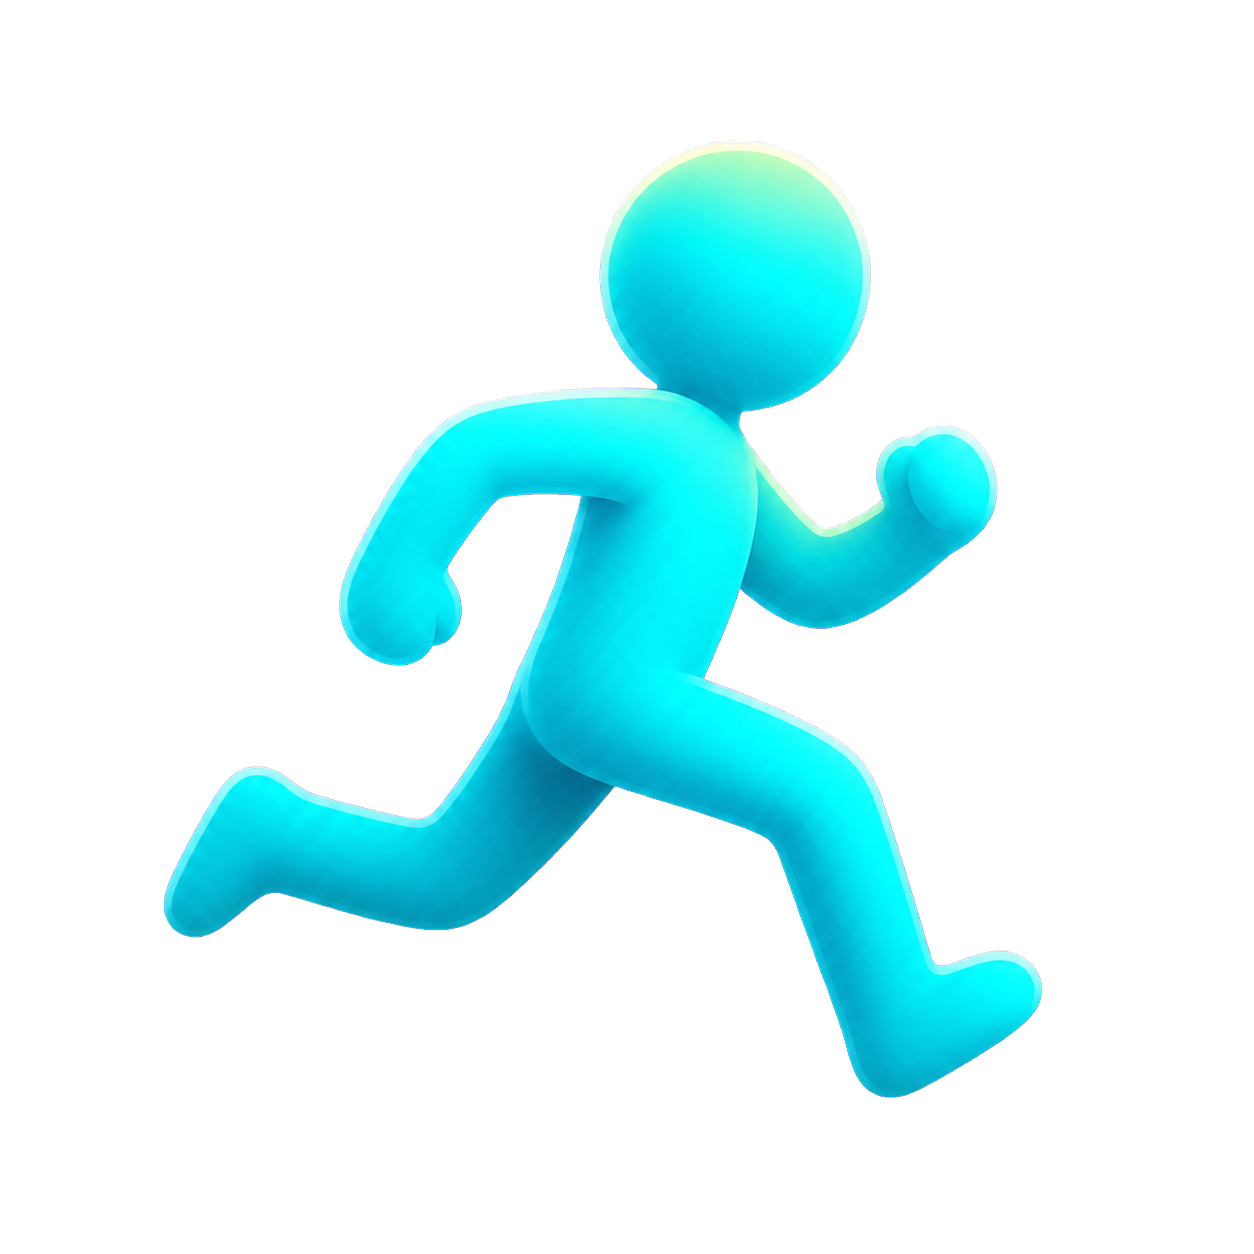
Check the image over both a light and a dark background in an editor that supports transparency. The empty area should reveal whichever background you place underneath it. If a checkerboard stays visible as part of the picture, it has been painted into the image.
That distinction matters: a .png filename alone does not establish transparency. AnimGen's Transparent animation workflow needs meaningful source alpha. If your artwork has an ordinary background, isolate it first or choose the regular animation workflow for a result that includes a scene. The transparent animation guide explains the input requirements.
Describe the motion and keep the camera still
Open the Studio, sign in, upload the image, and choose Transparent animation. Pick from the model, duration, and resolution options currently offered in the interface, then review the credit cost before generating.
The short motion brief shown in our demo is:
Run, jump, land, then keep running. Side view, fixed camera.
It names the actions in order and keeps the viewing angle consistent. For your own character, you can add a constraint such as “Keep the entire character visible and preserve its original design.” Treat this as guidance to the model and inspect the result afterward.
A combined action is useful for exploring a character's movement. For a playable character, it is often more practical to work toward separate run and jump clips, so the game can trigger each action when needed. Here are two starting prompts you can adapt:
Run:
The character runs in place, facing right in side view.
Fixed camera. Keep the whole body visible and preserve the character design.
Jump:
The character crouches, jumps upward, then lands with bent knees.
Side view, fixed camera. Keep the whole body visible throughout the jump.
These are suggested prompts, not recorded settings for a guaranteed result. A run-in-place clip is a useful starting point when your game will move the character through the level. A jump clip still needs to be matched to the game's movement and state transitions.
The launch video compresses the waiting and editing process. Actual generation time depends on the model, queue, and selected settings.
Review the motion before choosing the export
In the transparent workflow, an initial generated video may have a green or magenta background. That is a temporary key-color intermediate; alpha is created during the appropriate export process.
At this stage, concentrate on the motion:
- Run: Is the stride readable? Do the body shape and facing direction stay consistent?
- Jump: Can you see preparation, takeoff, the airborne pose, and landing?
- Framing: Do the feet, hands, or head leave the canvas?
- Continuity: Does the character change shape abruptly or gain unwanted details?
Choose a clean interval instead of assuming the entire generated video belongs in the final animation. If the intended motion is missing or an important pose is badly distorted, revising the input or prompt may be necessary. Frame selection can remove unwanted material; it cannot redraw a damaged pose.
For a run loop, play the chosen interval repeatedly and watch the last-to-first transition. The feet, silhouette, and apparent speed should make sense across that boundary. A loop switch repeats your selection—it does not make mismatched endpoint poses connect automatically.
Give the jump a brief hold with frame editing
One edit illustrated in the demo is giving the airborne pose a little more time to read.
Open Fine-tune animation from a ready video. In Source Frames, select the useful frames and insert or drag them into Animation Sequence. Play the output sequence to review their order and timing.
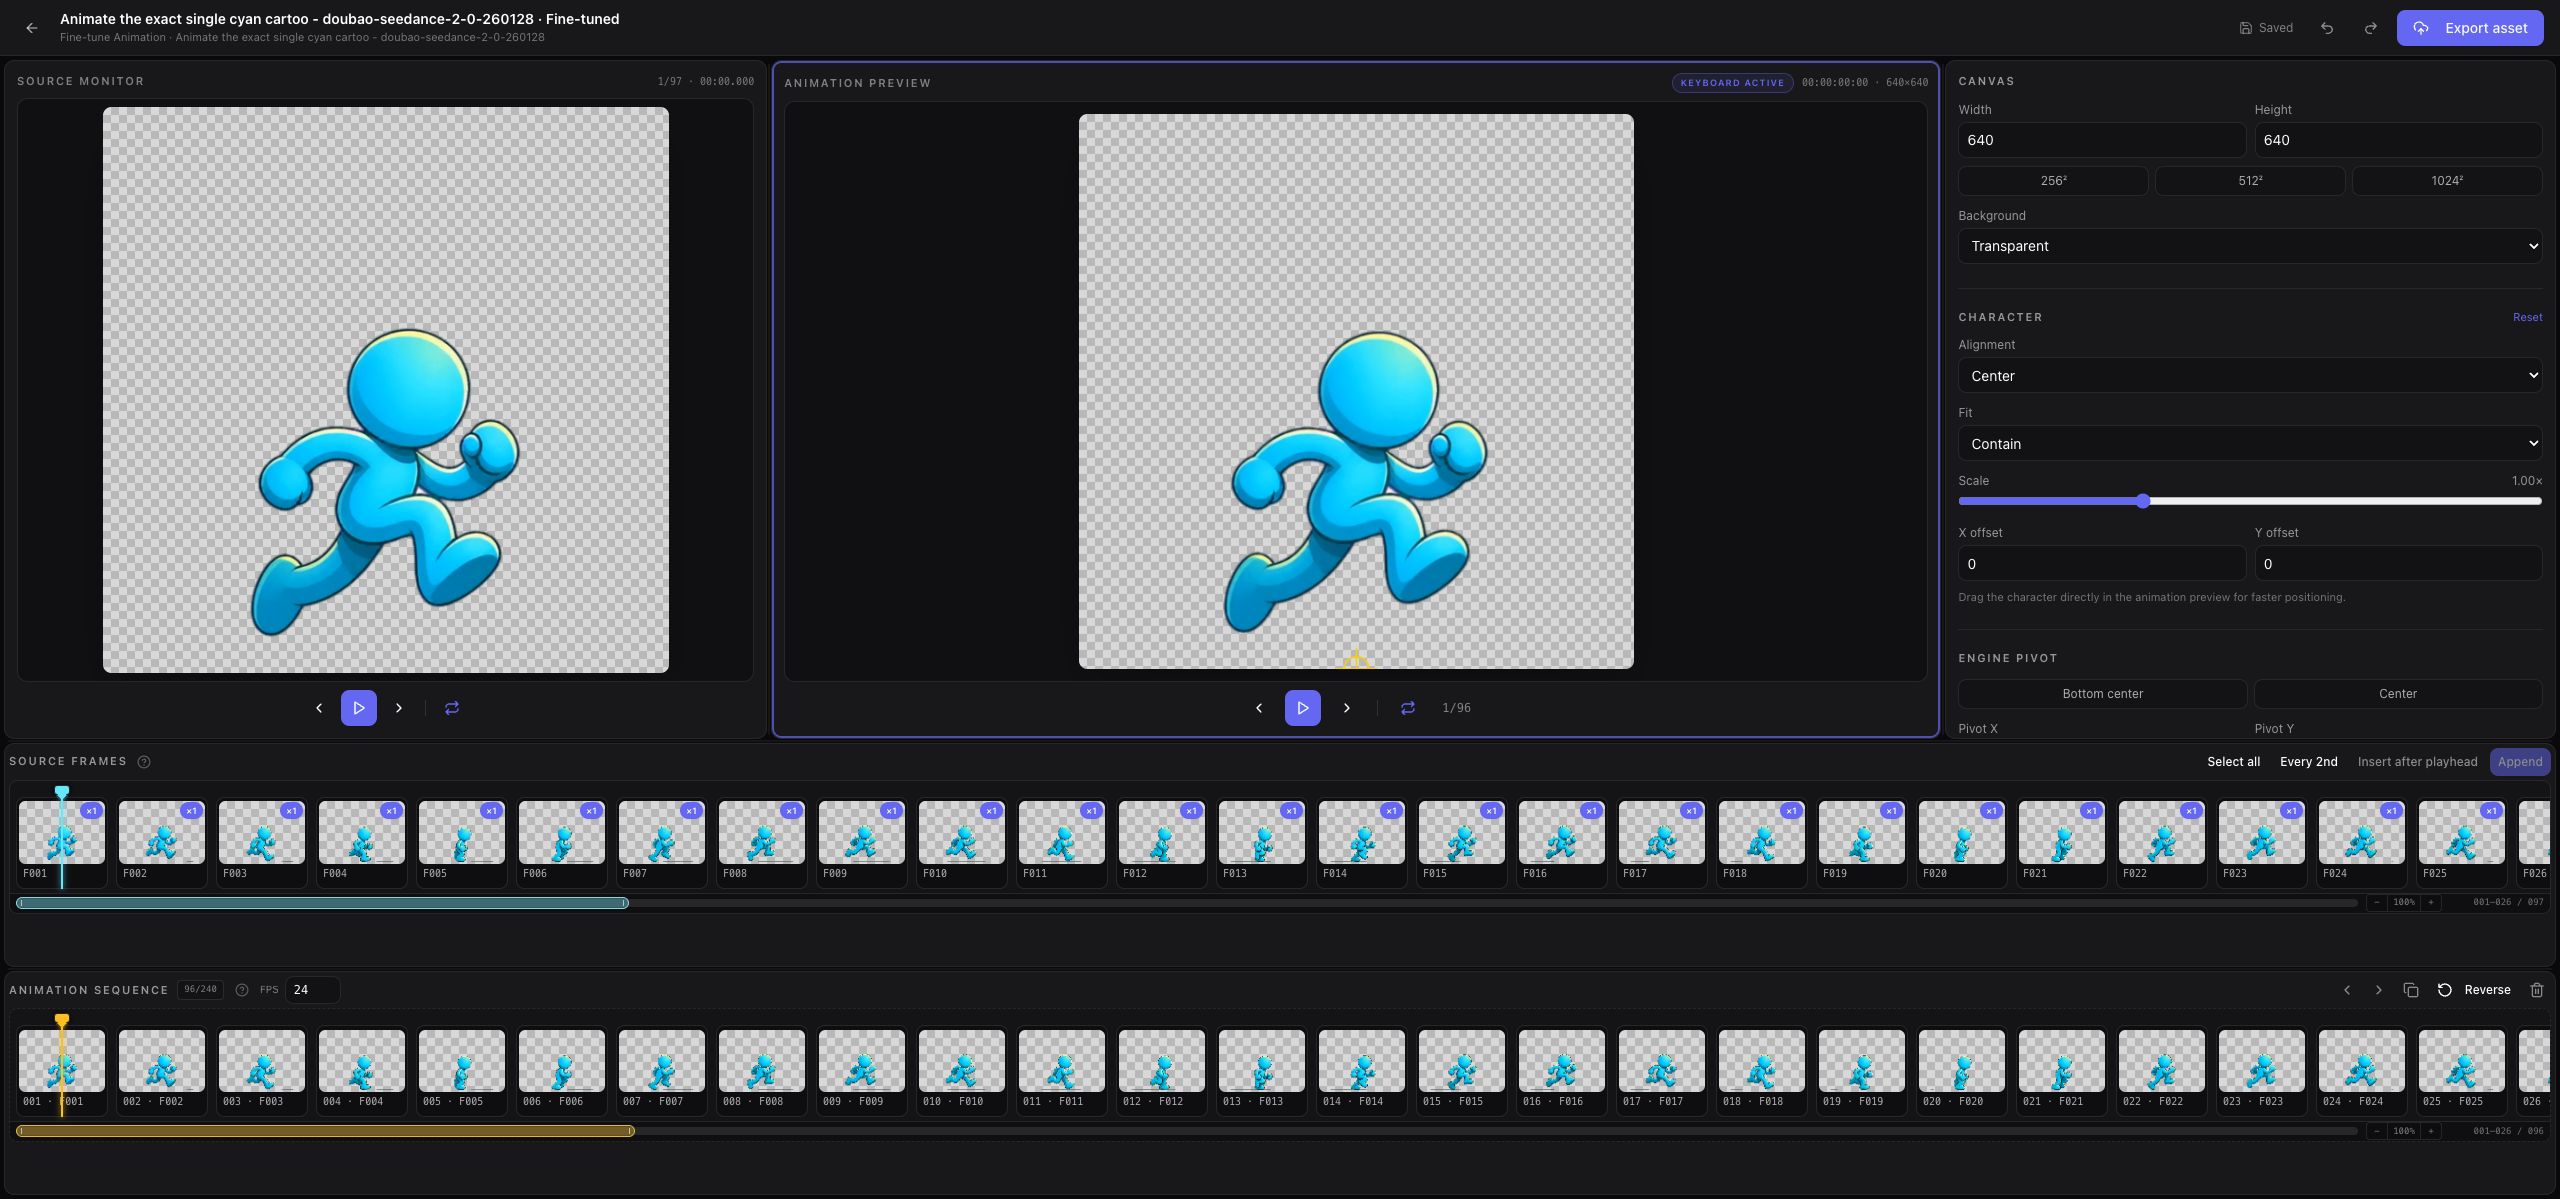
The editor separates the source video from the sequence you are building. The screenshot shows the workspace; the following small example explains the timing edit illustrated in the demo.
The demo uses these sampled source-frame labels to make the change easy to see:
Before: F042 F046 F050 F054      F058 F064 F070
After:  F042 F046 F050 F054 F054 F058 F064 F070
Selecting the F054 item in the output sequence and choosing Duplicate repeats that pose beside itself. At the demo illustration's 8 fps, the sequence grows from seven frames, or 0.875 seconds, to eight frames, or 1 second. The extra copy adds a 0.125-second hold.
These labels refer to the demo assets; find the corresponding pose in your own generated clip. Use this small sequence to understand the control, then choose enough intermediate frames and an appropriate FPS for your actual animation. Repeating a pose changes its screen time. Increasing the output FPS changes playback speed; it does not create new in-between poses. Keep a jump hold brief and check the landing afterward—a long freeze can make the motion feel stalled.
The current editor works with existing frames and global canvas placement. Its controls do not repaint individual poses or automatically align every frame. See the Advanced Editor guide for the complete workflow. Before exporting, wait for the edit status to show Saved.
Export for the place the animation will be used
Choose your output based on where the animation is going:
| Destination | Output to consider | What to check |
|---|---|---|
| Inspect individual poses and transparency | PNG frames | Edges, frame order, and dimensions |
| Use the animation as 2D sprites | Sprite sheet with frame data | Frame layout, timing, and pivot |
| Import into a supported game engine | Engine pack | The supplied import instructions and a test scene |
| Play alpha video in a compatible web environment | WebM Alpha | Actual alpha playback in your target browser |
| Composite in a video editor | ProRes 4444 | Alpha interpretation in the target editor |
An ordinary MP4 preview is not the alpha deliverable from this workflow. For a lightweight reference, you can download our public transparent motion sample, a 512 × 512, four-second WebM used in our site and video assets. It is a separate sample for checking playback, not the eight-frame timing example above.
For engine use, follow the relevant Godot 4, Unity, Unreal Paper2D, or Cocos Creator instructions. A package gives you animation assets and import information; the game's movement, collisions, and state transitions still belong in the game project.
Choose the output you actually need and review its access requirements and quote. PNG inspection is a useful first step before committing to a production format. Check current pricing and export access for advanced formats and commercial-use terms.
Check the animation on its destination background
Preview the exported character against a light background, a dark background, and the scene where you intend to use it. Watch the complete movement, especially fast hands and feet, fine details, and the landing.
If transparent PNGs look correct but the video appears on black, investigate the video player's alpha support before paying to regenerate the motion. If the same unwanted background appears in every output, revisit the source, transparent workflow, and export canvas. The format compatibility guide and export troubleshooting guide explain those checks.
You are ready to try the workflow when you have one isolated character, a clear action brief, and a destination format in mind. Open AnimGen and animate your character, or inspect the transparent workflow and downloadable samples first.