In this guide
A green background can disappear from an animation while a green outline remains around hair, fabric, or motion-blurred edges. The file may already contain transparency. The remaining problem is often the colour stored in its partially transparent pixels.
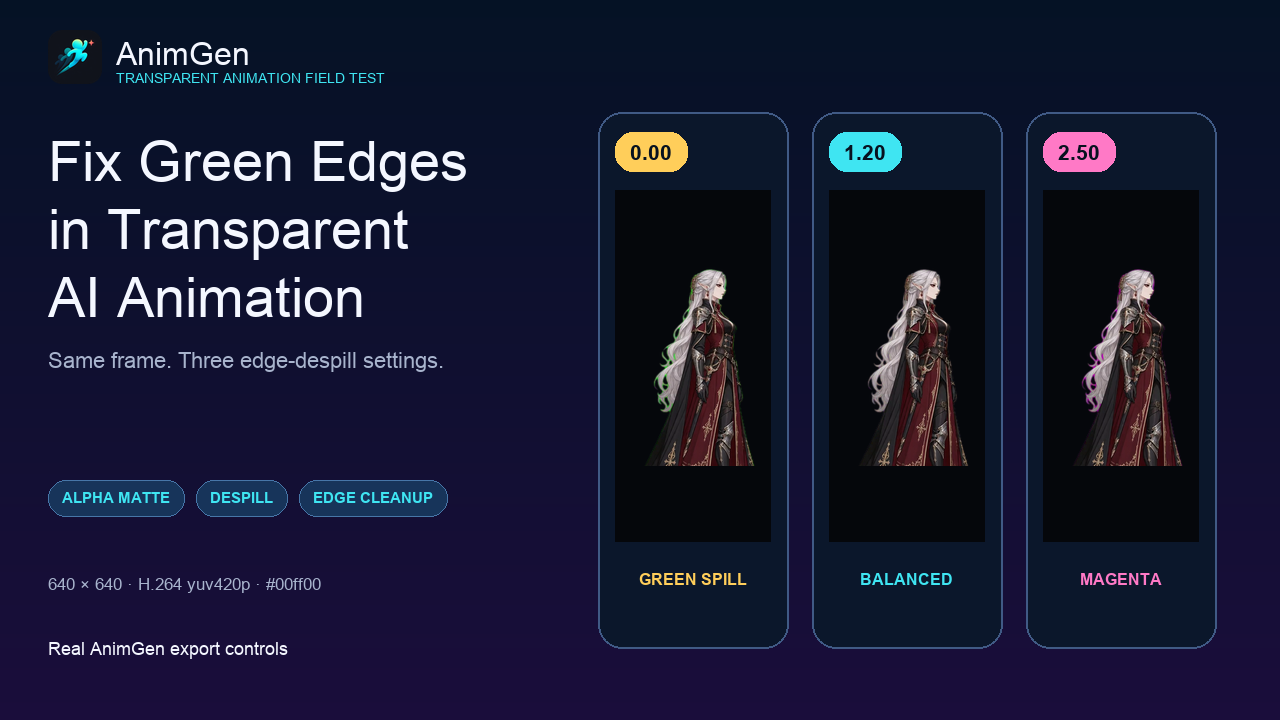
We reproduced that problem with a project-owned silver-haired character generated for AnimGen. The source video is 640 × 640 H.264 with yuv420p chroma subsampling. We selected a four-second range at 24 FPS for a 96-frame export, then used its first frame for controlled comparisons. Every image below keeps the same source frame, #00ff00 key colour, clean plate, and production keyer. Only the named control changes.
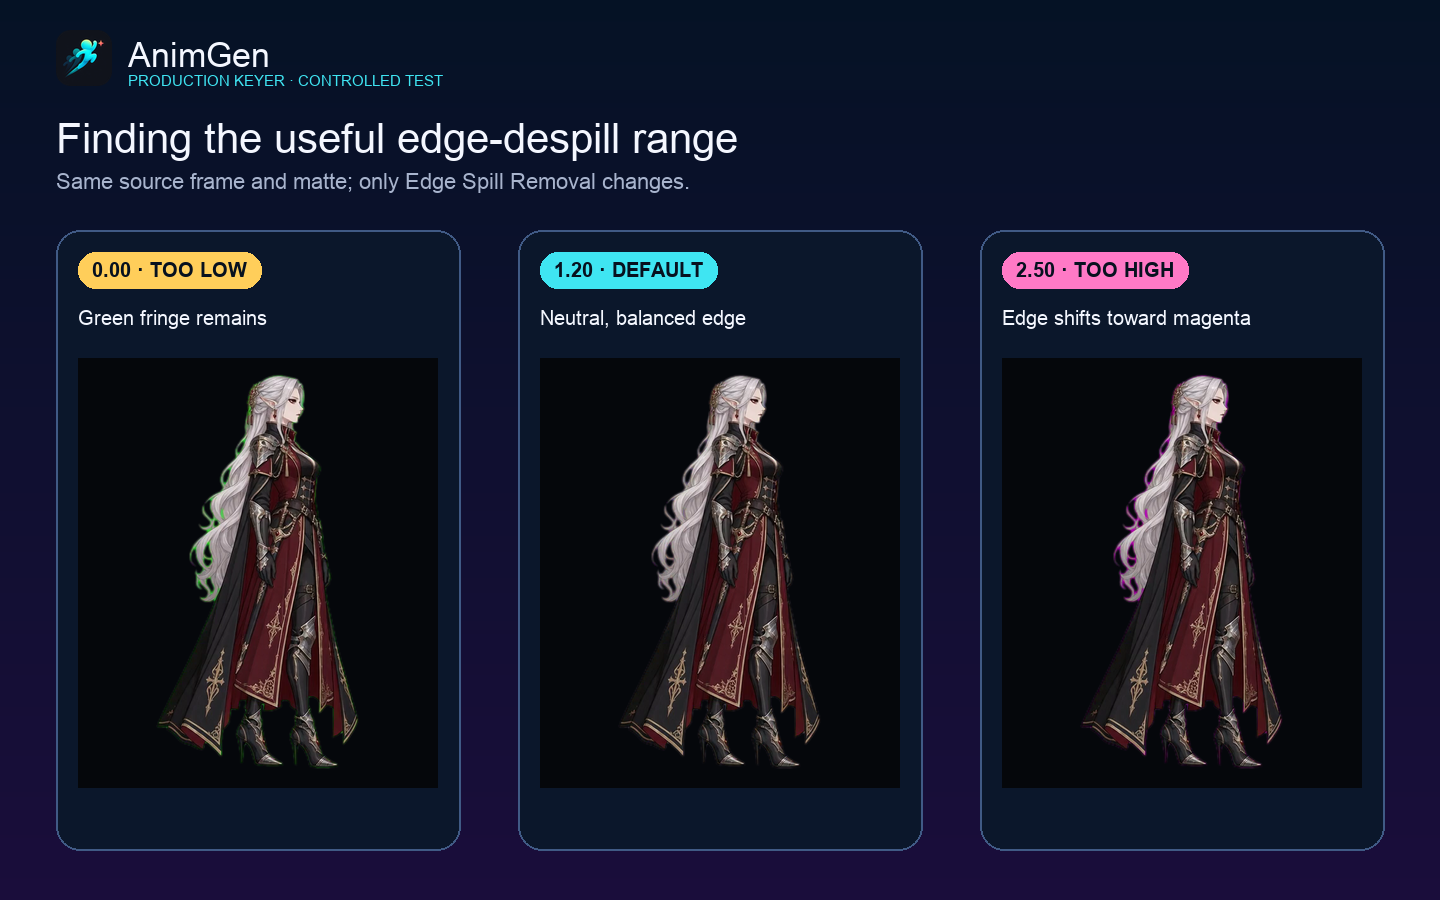
At 0.00, green remains around the silver hair, cloak, and feet. The default 1.20 is much closer to a neutral edge for this frame. At 2.50, the outline moves past neutral and becomes magenta. That three-way comparison is more useful than a generic “before and after”: it shows both the defect and the cost of pushing one correction too far.
Transparency and edge colour are separate checks
An RGBA pixel carries red, green, blue, and Alpha values. Alpha controls how much of the pixel appears in the composite. RGB controls the colour contributed by the visible part of that pixel.
Hair and anti-aliased contours contain many partially transparent pixels. In a green-screen source, those pixels can contain a mixture of character colour and green background. Removing the background from Alpha does not automatically make that mixed RGB neutral. When the animation is placed on a dark scene, the remaining green becomes easy to see.
This separation also appears in established keying tools. Adobe divides Ultra Key controls into matte generation, matte cleanup, and spill suppression; its current parameter reference describes edge softening and spill removal as different operations. Blender's Keying node likewise exposes matte controls, edge controls, and a separate despill factor.
The source codec matters too. This test video uses yuv420p, so chroma information is stored at lower spatial resolution than luminance. Fine silver hair against saturated green is a demanding boundary: compression and sub-pixel coverage spread colour across nearby samples even when the silhouette still looks sharp.
Read the Alpha matte before correcting colour
AnimGen's Alpha view renders opaque pixels as white, transparent pixels as black, and partial coverage as gray. It removes the distraction of character colour and makes background contamination visible.
For the next comparison, only Background threshold changes. Foreground threshold, edge contraction, feathering, and all three spill controls stay at their defaults.
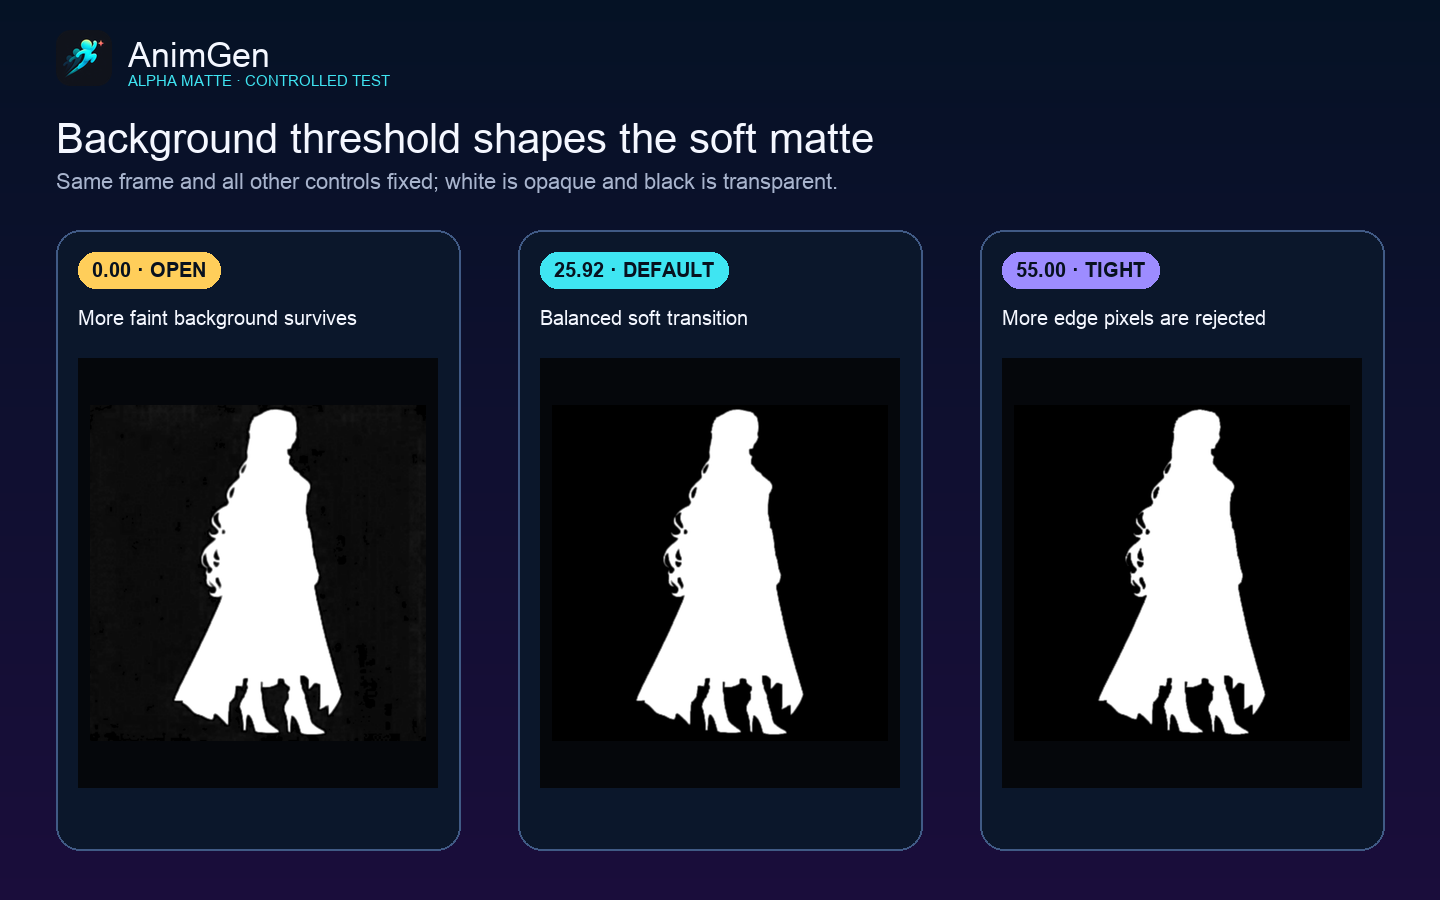
With Background threshold at 0.00, small differences from the clean plate survive across most of the frame. They appear as a dark mottled field in the matte. At the default 25.92, the empty background becomes black while the hair silhouette remains. Raising it to 55.00 rejects more edge pixels and tightens fine contours.
The useful value depends on the source. A flat, stable plate may tolerate a tighter threshold. Compression noise, a changing generated background, smoke, glow, or fine hair may need more room. Increase the threshold until empty areas are clean, then inspect thin details before moving on.
Foreground threshold controls the other end of the same transition. Lowering it makes more of the subject fully opaque; raising it preserves a wider semi-transparent region. Check the face, clothing, weapon, and other interior areas while adjusting it. An apparently clean silhouette can still contain unwanted transparent patches inside the character.
Contraction and feathering shape the contour
Once the matte separates the subject from the empty background, two controls refine its geometry:
- Edge contraction moves the contour inward. A small amount can remove a bright or coloured rim. Large values erase thin hair, cloth tips, weapon edges, and small gaps.
- Edge feather smooths the transition between transparent and opaque pixels. It can soften a harsh cutout, but excessive feathering creates a blurred halo.
AnimGen presents both values at a 480-pixel reference size and scales their effective pixel radius for the export resolution. This makes the control behave consistently when the same animation is exported at a different size.
Use contraction only after the background and foreground thresholds are in a sensible range. Otherwise it can hide a noisy matte by cutting away legitimate subject pixels. Feathering should be judged at the final output size: a soft contour that looks pleasant at 400% zoom may look muddy in a 96-pixel game sprite.
The seven controls handle two different jobs
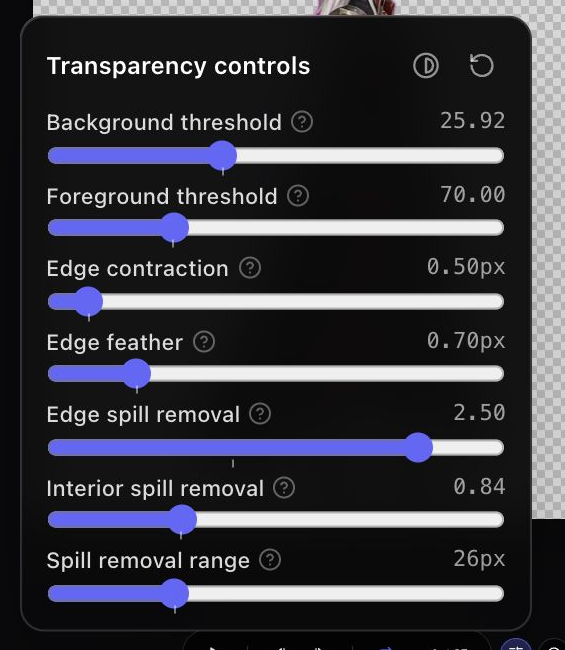
The transparency panel keeps matte geometry and colour correction in one place, while each control still has a narrow role.
| Control | What it changes | Common reason to adjust it | Risk when pushed too far |
|---|---|---|---|
| Background threshold | Transparent endpoint of the matte | Remove background noise or plate variation | Loses faint edge detail |
| Foreground threshold | Opaque endpoint of the matte | Make the subject core solid or retain partial coverage | Creates hard edges or weak interiors |
| Edge contraction | Matte contour radius | Remove a residual rim | Erodes hair and thin shapes |
| Edge feather | Matte transition softness | Smooth a jagged contour | Produces a soft halo |
| Edge spill removal | Key-colour correction near the contour | Remove green or magenta fringe | Shifts the edge toward the opposite hue |
| Interior spill removal | Key-colour correction away from the contour | Repair reflected key colour inside the subject | Changes legitimate subject colours |
| Spill removal range | Width of the edge-to-interior transition | Confine strong correction to a wider or narrower band | Spreads the wrong correction across too much of the subject |
The first four primarily affect Alpha geometry. The last three primarily affect RGB colour recovery. Keeping that distinction in mind makes troubleshooting faster: a dirty Alpha view calls for matte controls; a clean silhouette with a coloured fringe calls for spill controls.
Despill has a useful range
Edge spill removal operates on the colour near the contour without changing the Alpha matte. The close-up below uses the same fixed crop from all three outputs, enlarged without changing its aspect ratio.
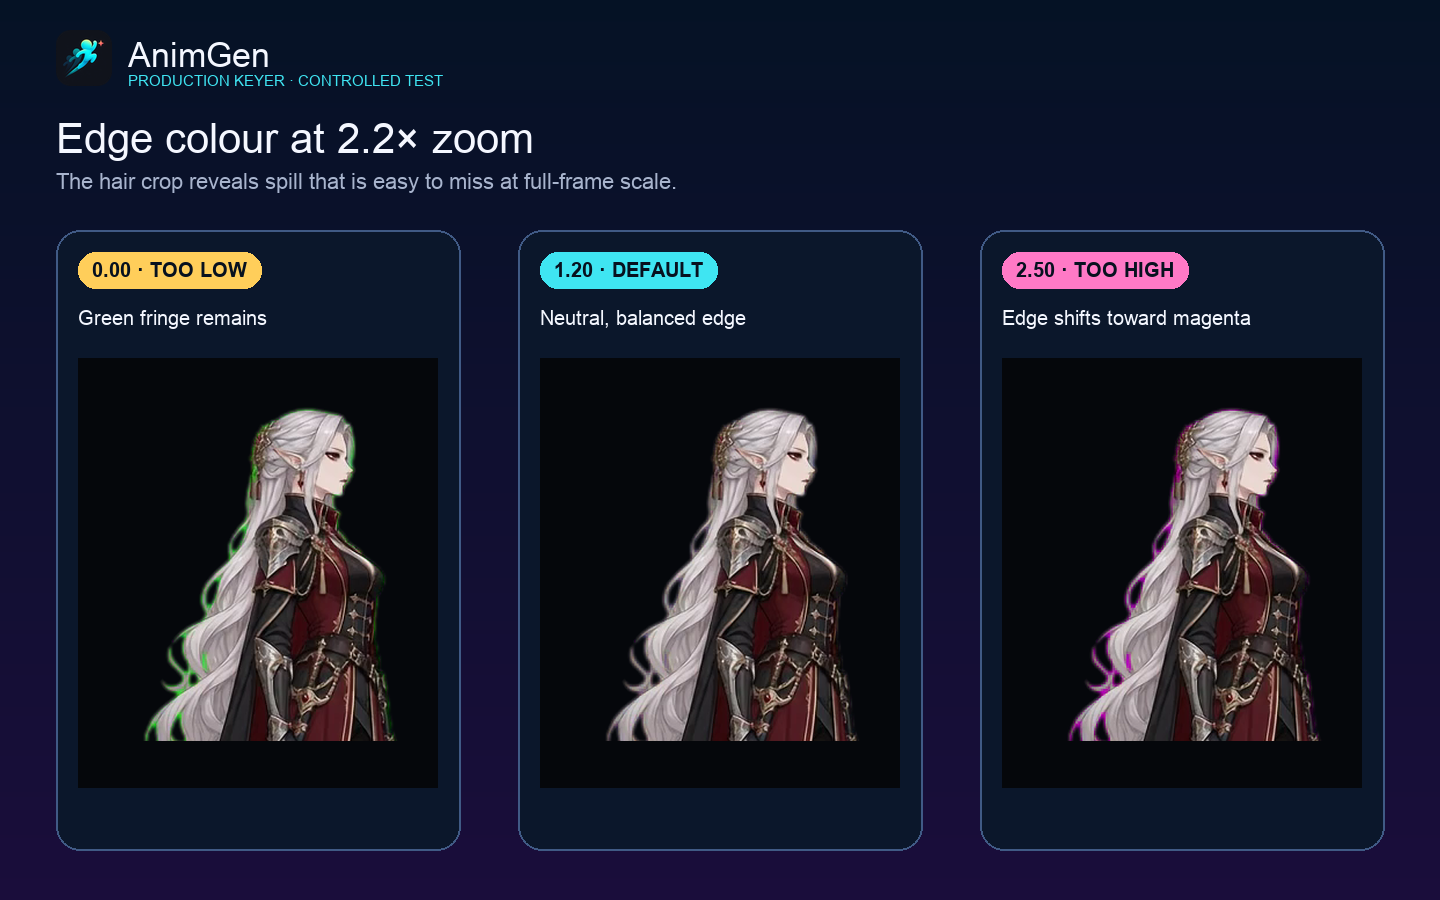
The left image has the correct silhouette, but green remains in the RGB values around the hair. The middle image removes most of that colour while leaving a light, neutral transition. The right image has enough green removed that red and blue dominate, producing a magenta line.
This is why the strongest despill value is rarely a useful default. Increase it while watching pale edges and semi-transparent strands, then stop when the key colour is no longer distracting. If the edge changes to the complementary hue, move back.
The two related controls help localize the correction:
- Interior spill removal applies a separate strength farther inside the subject. Reduce it when the character legitimately contains colours close to the key or when skin, metal, and fabric begin to shift.
- Spill removal range controls how wide the edge band is before the correction transitions to the interior strength. It changes the location of that transition, not the two strength values.
For this sample, the default edge value of 1.20, interior value of 0.84, and range of 26 produced the most natural of the three tested edge settings. Those numbers describe this source and the current keyer. Treat them as a starting state, then judge the actual animation.
The complete reference state used for the balanced sample is below. Keeping all seven values together makes it easier to reproduce the comparison before changing one control at a time.
Background threshold: 25.92
Foreground threshold: 70.00
Edge contraction: 0.50
Edge feather: 0.70
Edge spill removal: 1.20
Interior spill removal: 0.84
Spill removal range: 26
Start from this card only when you want to follow the same test. Your final values should come from the Alpha view, the colour of the contour, and the frames that contain the most motion.
Check checkerboard, light, and dark backgrounds
A single preview background can conceal the remaining defect. We placed the default output over three surfaces without changing its RGBA pixels.
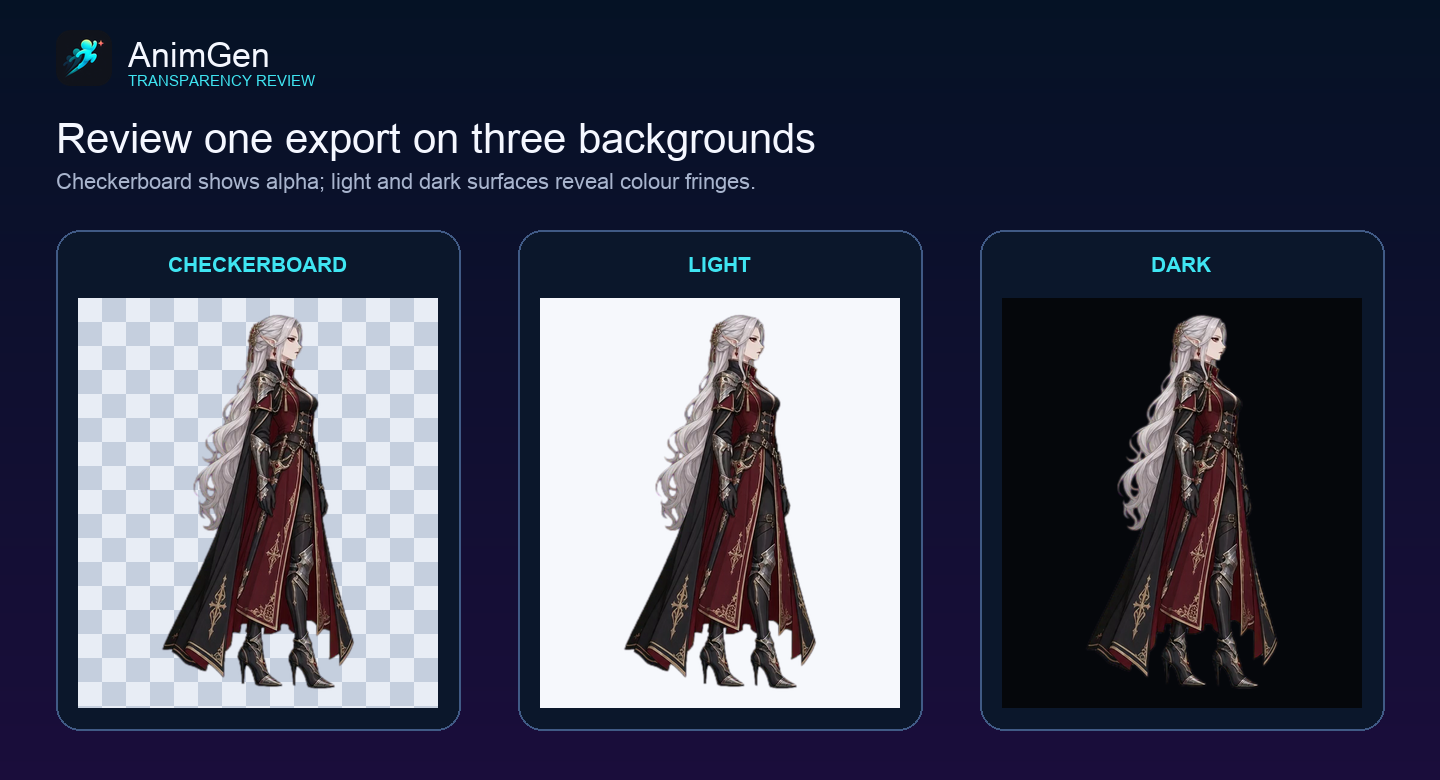
- Checkerboard confirms where Alpha is present and exposes large semi-transparent patches.
- Light background reveals dark contamination, over-contracted edges, and transparent holes inside the subject.
- Dark background reveals bright rims and green, blue, or magenta colour spill around pale details.
The controlled figures use one frame so that the parameter change remains the only variable. A production check must cover the sequence. Scrub the beginning, a high-motion section, and the end; inspect frames where hair or cloth crosses the key colour; then play the loop on each background. Video compression and generated background variation can move from frame to frame.
A repeatable tuning order
Use this order when a transparent animation has a dirty outline:
- Reset the controls, choose the correct key colour, and open Alpha view.
- Raise Background threshold only until empty areas become black.
- Adjust Foreground threshold while checking that the subject interior stays solid.
- Add the smallest useful Edge contraction if a rim still follows the contour.
- Add Edge feather only when the silhouette is visibly harsh at delivery size.
- Return to the composite view and raise Edge spill removal until the key colour stops drawing attention.
- Use Interior spill removal and Spill removal range to limit colour correction, then review several frames on checkerboard, light, and dark backgrounds.
Export a few PNG frames before choosing the final delivery format. A PNG makes the Alpha channel and edge pixels easy to inspect without involving a video decoder. Once those frames look correct, choose WebM Alpha, ProRes 4444, or a PNG sequence for editing and web delivery, or compare a sprite sheet with a PNG sequence for a 2D game runtime.
Questions that come up during edge cleanup
Why does a transparent PNG still have a green outline?
Transparency and colour are stored separately. Partially transparent pixels can keep green RGB values from the original key background. They contribute that colour when composited over a new scene.
Will stronger despill remove more background?
Despill corrects RGB colour. It does not clean the Alpha matte. Use Background threshold, Foreground threshold, contraction, and feathering for opacity and contour problems.
Why did the edge become magenta?
The correction removed too much green from pixels near the contour, leaving red and blue relatively stronger. Reduce Edge spill removal or narrow the range receiving the stronger edge correction.
Should every animation use the values shown here?
No. The tested values belong to one 640 × 640 green-screen source. Key colour, compression, subject colours, motion blur, output resolution, and generated background stability all change the useful range.
If you already have a character PNG with meaningful transparency, the transparent animation workflow can generate motion on a controlled background and expose these controls before export. Use the Alpha view to clean the matte, judge colour on several backgrounds, and keep the setting that survives the frames and destination where the animation will actually run.