In this guide
A prompt such as “roll forward and stand up” leaves the model to decide how the character crouches, turns and gets back on its feet. A reference video gives it a visible sequence to follow: your character image supplies the appearance, and the video guides the movement.
In AnimGen, this AI motion control workflow lives in References mode. Add your character and a short video, select the part you want and generate. It helps most when you already have a particular attack, jump or gesture in mind and showing its timing is easier than describing it.
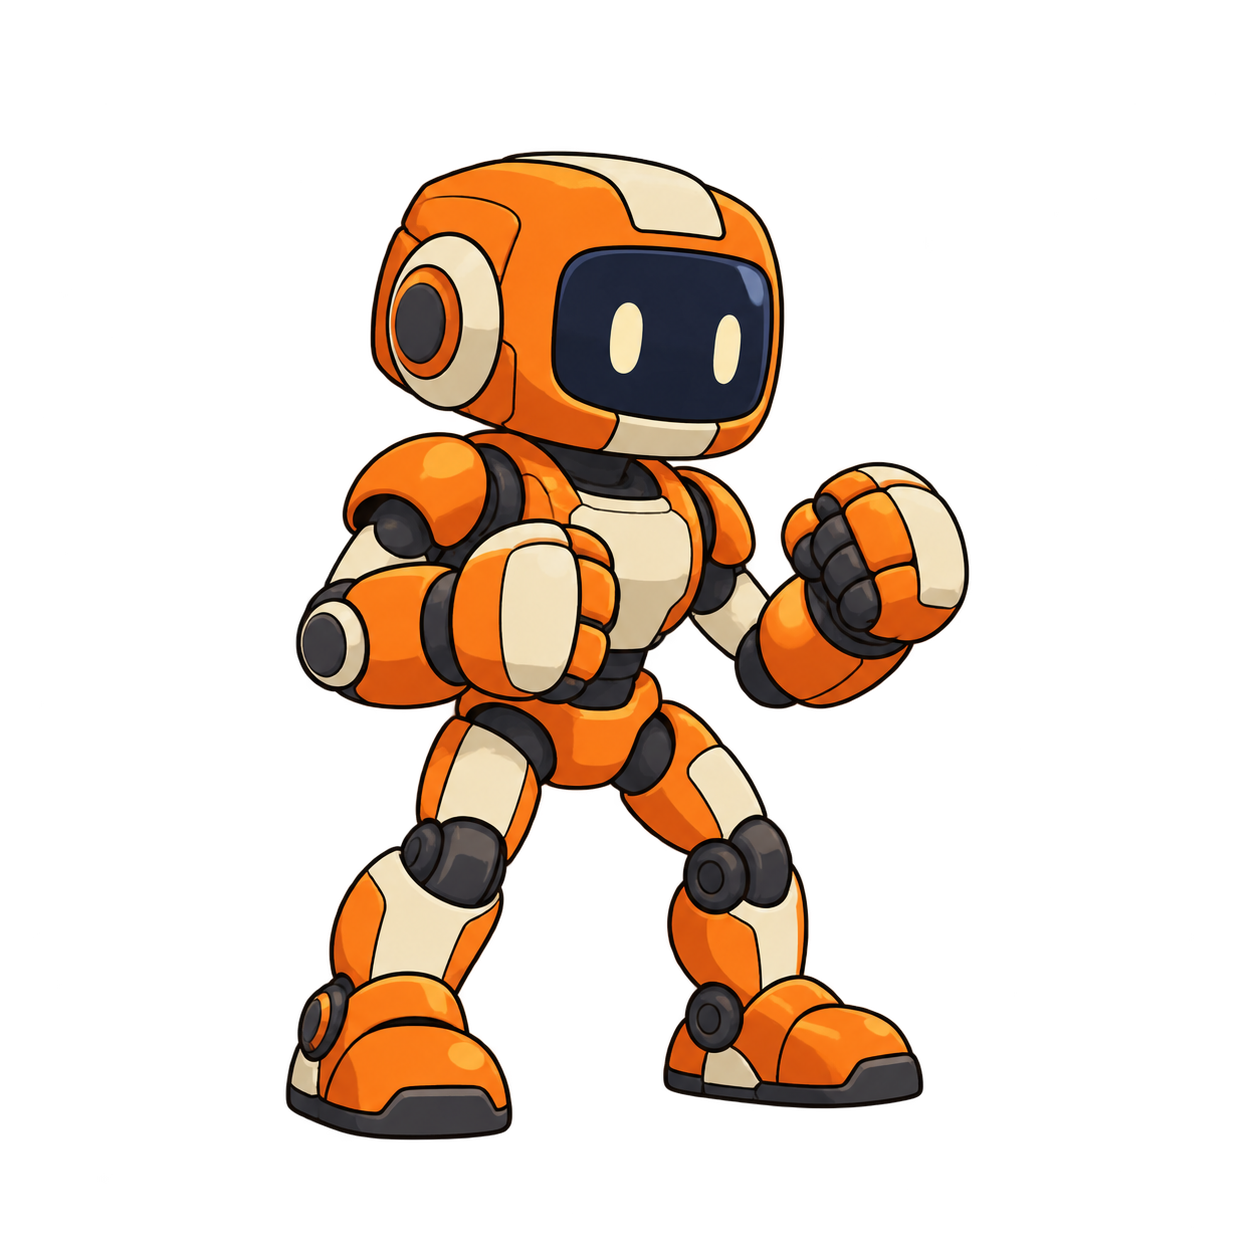
Here, an orange robot follows a rendered 3D roll. We used Seedance 2.0 Fast at four seconds, 480p and 1:1, with Convert to depth turned on. The robot rolls once, stands up and holds its pose. The download measures 640 × 640 pixels, 97 frames at 24 FPS. It starts from a different pose than the reference, so judge the whole movement, not just the ending.
Choose a reference with a complete action
The reference here is the roll from Quaternius's Universal Animation Library, which is released under CC0. We rendered it from a fixed camera and held the final pose to make a four-second clip; the movement itself plays at its original speed.
Pick a clip with one visible character, a fixed camera and a view close to the angle you want in the result. Keep the hands, feet and any weapon inside the frame for the whole action. If a tight crop hides the landing, the model has less to go on when it finishes the move.
Include the preparation and the recovery. A jump reference should show the takeoff and the landing; an attack should show the wind-up and the return. Cut out unrelated actions and camera cuts before you ask for one specific move.
To follow along with the same setup, download the reference clip and the robot image.
Add the character and video in References mode
Open the AnimGen workspace, switch to References and add your character as the first reference image. A clear, full-body image works best for a first try.
In References mode, that image guides the character's appearance; it is not used as a fixed first frame, so the result won't necessarily open on your image's pose. The First frame and First + last frame modes don't take a video reference.
Under Video reference, choose Upload new, or Resources to reuse a video already in your workspace. The panel accepts MP4, MOV and WebM files of 2–30 seconds, up to 100 MB, with an aspect ratio between 2:5 and 5:2. If your browser can't preview a file, try converting it to an H.264 MP4.
Then choose the model. Once a video is added, the model list only shows models that support video references.
Leave room for the movement before you generate. For the roll, we used Expand Canvas with a 1:1 canvas and the robot at 67% scale, centred, because a forward dive stretches the body much wider than its standing pose. For transparency, we used Alpha Key with a manually chosen green key colour.
Select the movement on the timeline
Drag the two edges of the selection to set its start and end, or drag the whole selection along a longer source. Use Play selection, the frame-step buttons and Loop selection to check exactly what will be sent.
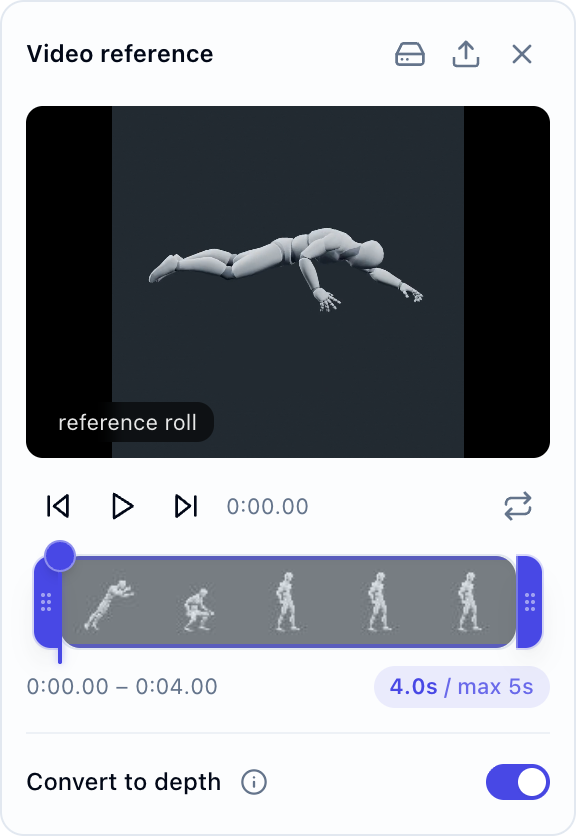
A selection runs from 2 to 5 seconds, and some models allow less; the panel shows the current model's maximum beside the selected length. Our four-second source already fits, so we kept the full range. On a longer recording, select one complete move rather than several unrelated actions.
The selection and the output duration are separate settings, so a two-second reference doesn't automatically produce a two-second video. Choose an output duration that fits the whole action, then check what the model does with any time left over. Our robot used it to hold its final pose.
Decide whether to turn on Convert to depth
Convert to depth is off by default. With it off, AnimGen sends the selected clip as it is, including the colours, faces and background in the footage. Turn it on when you want the video to supply the movement only: depth conversion keeps the motion and the body's shape and drops colour, faces and background. It also adds some processing time before the generation starts.
We turned it on for the roll, so the model received the movement of the rendered figure without its grey 3D surface. If your clip shows a real person, turn it on too: clips with real people that are sent as they are may be rejected.
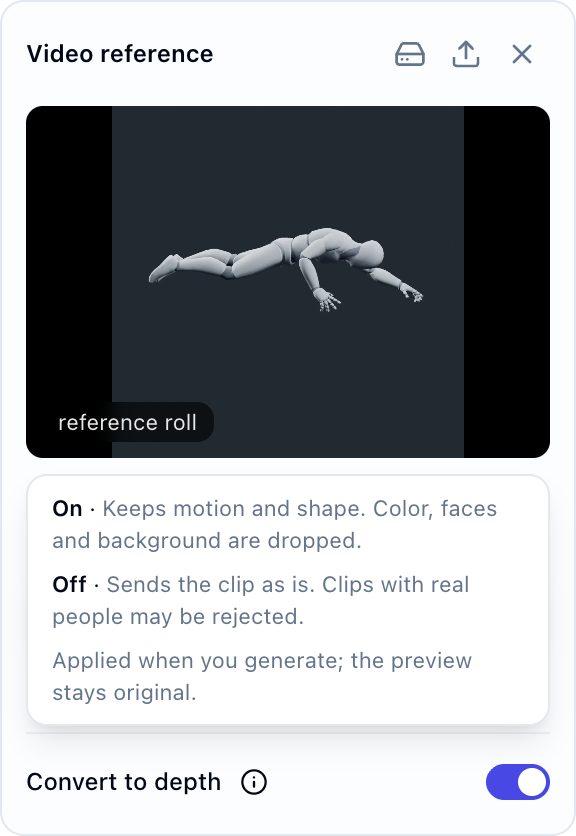
The preview keeps showing the original video, because the conversion only runs when you generate. Switching the setting on won't turn the preview grey.
Depth conversion can only work with what the camera sees. It can't reveal a hidden hand, restore feet that leave the frame or turn an obscured movement into an exact skeleton.
Write a prompt that separates appearance from motion
Name what each input is for: image 1 for how the character looks, video 1 for how it moves. This matters most with Convert to depth off, when the model also sees the colours and clothing of whoever is in the reference.
We wrote our prompt in Chinese. Here it is in English, minus one request for a plain green background with no shadows; with Alpha Key on, AnimGen adds the key-colour background instruction itself.
Image 1 is the only reference for the character's appearance. Keep the orange robot's colours, body proportions, cartoon linework and the smaller size it has in the input image; don't enlarge it to fill the frame. Closely follow the order and timing of the movement in video 1: roll forward once and stand up, then hold the ready pose until the video ends. Don't repeat the roll. Fixed camera, no zoom, no cuts. Keep the whole body, including both hands and feet, inside the frame at all times, with plenty of room around it for the movement. Don't add any other characters or objects.
Choose the output duration, resolution and aspect ratio, then read the credit estimate before you generate. A reference video changes the quote, so a price you saw for image-only animation won't apply. On November 11, each of our four-second, 480p attempts was quoted 43 credits. We needed two attempts, for 86 credits in total.
For a first test, use the smallest suitable output size and check the motion before paying for a larger render. When you change the prompt, keep the other inputs the same so you can see what the change did.
Check the action before exporting
Watch the reference and the full result at normal speed. Compare the order of the poses, how many times the action happens, the direction the character faces and the recovery. Then step through the fastest part of the move and check the face, limbs and proportions frame by frame.
That frame-by-frame check is why we discarded our first attempt. It rolled once and stood up, but the right hand left the canvas in frames 13 and 14. That attempt had no Expand Canvas space, and its automatically chosen key colour, magenta, left visible colour spill after background removal. For the second attempt, we added the Expand Canvas space described above and picked green by hand. All 97 frames then stayed clear of the edges.
AI motion transfer guides a generated performance; it doesn't copy the reference joint for joint. The model can shift the timing or read a gesture differently. If a particular landing or strike matters to gameplay, inspect those frames directly instead of judging from the thumbnail.
Once the movement works, trim the unused lead-in or tail frames, keeping enough recovery to lead into the next animation state. The sword attack editing example shows how choosing a range changes an action's game feel; for repeated locomotion, use the walk-cycle guide.
Prepare the transparent asset for your project
For the game-asset version, we kept frames 0–53: 54 consecutive frames, or 2.25 seconds at 24 FPS. That covers the roll and the return to standing and drops the long final hold. No poses in between were removed, and playback wasn't sped up.
Download the transparent WebM or the 54-frame PNG sequence. Both use the same 2.25-second selection; the full generated motion is in the comparison at the top.
With Alpha Key, the key colour is removed when you export transparent files. Check the edges over both a light and a dark background before you place the character in a scene.
Export a PNG sequence for editing individual frames, a sprite sheet for a game runtime, or transparent video where the destination supports it. Keep a 24 FPS source at 24 FPS unless you want different timing on purpose. The transparent animation maker and the video-to-sprite-sheet workflow cover those next steps.
Common questions about video-guided character animation
Can I use a video I recorded myself?
Yes, if it meets the input limits and you have permission to use it. A clear, single-person action and a steady camera make the movement easier to read. Because the clip shows a real person, turn on Convert to depth: clips with real people that are sent as they are may be rejected.
Is this the same as exporting motion capture?
No. The result is a generated animation video that you can process into image frames or other supported assets. This workflow doesn't export a 3D skeleton, an FBX rig or editable joint animation.
Why does the result repeat the action?
Check whether the selected reference already includes a repeat and whether the output lasts longer than the action. State the number of repetitions and the ending you want in the prompt, then review the new result: wording alone doesn't guarantee the exact count.
Can I use video reference through the API or MCP?
Yes. Besides the web workspace, AnimGen supports video references through its API and MCP server, so you can connect them to your own tools or AI workflows. The API input guide covers the request fields and limits. This tutorial covers the web workspace.